


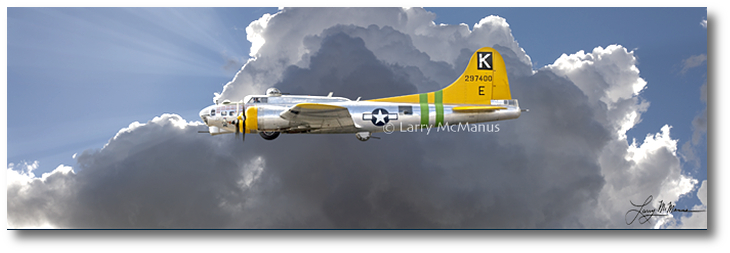
B-17 Flying Fortress by Larry McManus
 |
 |
 |
|
|
|
For more artwork by Larry McManus, click here Choose from:
|
 These four foot wide "High Definition" prints were created to be reproduced at this width. This is the reason for the excellent detail, sharpness and color saturation that you'll see in every print. These are the most detailed aviation prints at this size you can find!
About the print:
In response for the Army's request for a large, multi-engine bomber, the B-17 (Model 299) prototype, financed entirely by Boeing, went from design board to flight test in less than 12 months. The B-17 was a low-wing monoplane that combined aerodynamic features of the XB-15 giant bomber, still in the design stage, and the Model 247 transport. The B-17 was the first Boeing military aircraft with a flight deck instead of an open cockpit and was armed with bombs and five .30-caliber machine guns mounted in clear "blisters." The first B-17s saw combat in 1941, when the British Royal Air Force took delivery of several B-17s for high-altitude missions. As World War II intensified, the bombers needed additional armament and armor. The B-17E, the first mass-produced model Flying Fortress, carried nine machine guns and a 4,000-pound bomb load. It was several tons heavier than the prototypes and bristled with armament. It was the first Boeing airplane with the distinctive -- and enormous -- tail for improved control and stability during high-altitude bombing. Each version was more heavily armed. In the Pacific, the planes earned a deadly reputation with the Japanese, who dubbed them "four-engine fighters." The Fortresses were also legendary for their ability to stay in the air after taking brutal poundings. They sometimes limped back to their bases with large chunks of the fuselage shot off.
HOW THEY'RE CREATED - IN THE ARTIST'S WORDS:
A great deal of planning and passion goes into each large format image...
The Concept...
First I sketch out what I want the nal image to look like and then create a shot list for the various parts of the image. Locations need to be identi ed for the background and aircraft shots and models need to be hired. Only then am I ready to shoot the various parts of the image.
The Plane...
By shooting the plane by itself on the ground in a controlled situation, I can get much better detail and dynamic range in the image than shooting in the air. The plane is set up at the right angle with the shadow in the right direction. The pilot is positioned and looking in the right direction and the plane is trimmed out with the control surfaces in the correct positions. Multiple shots are taken at various exposures and different angles can be easily achieved during the photo session.
The Background...
This is where you have to wait for nature to behave. The air to ground or cloud formation shots have to be taken at the right time of day with the shadows in the correct position. When you are just shooting the background from the air and not worrying about exposing a plane correctly, you are able to create more dynamic views and color saturation that meld together and make the aircraft pop out of the image.
The Creation...
There are no short cuts in creating the nal large format photo illustration. You start by editing fty or so shots down to the ten that will be used in the nal master image. This is where my background as a designer/artist comes in. The nal 2 GB master image can take forty hours or more of painstakingly detailed work to combine all the photos, re-illustrate parts of the scene and to color balance the nal image to achieve the original vision.
HOW THEY'RE PRINTED:
(HINT: LARRY'S FOUR FOOT WIDE (HD) MURAL PRINTS ARE NOT PRINTED USING ANY INKS!)
To reproduce the fantastic detail and saturated color, these aviation images are printed using actual red, green and blue lasers that can produce 68 billion colors. The lasers project the image on actual photographic material and then is processed through chemical baths. This gives you a TRUE HIGH DEFFINITON (HD) CONTINUOUS TONE IMAGE with no dots like you see in offset lithography printing. This printing method is far superior in detail and color depth than any other reproduction method.
WE OFFERS THESE PRINTS ON TWO TYPES OF (HD) ARCHIVAL MATERIAL... OR CANVAS:
1) A very high gloss for the best detail and color saturation
2) A semi-gloss for a very sharp and more muted feeling
3) On canvas
The canvas prints are printed with archival quality inks onto a unique impregnated glossy canvas media. This allows for the highest color saturation and detail you can achieve in a canvas print. The Gicl�e printing process provides better color accuracy than other means of reproduction on canvas. The quality of the Gicl�e print rivals traditional silver-halide and gelatin printing processes and is commonly found in museums, art galleries, and photographic galleries.


")


Copyright © 2003 - 2024 Aviation Art Hangar. All Rights Reserved.